Docker for developers
By Gaurav Nardia • 13.Apr.2026
In this article, we’ll talk about Docker end-to-end. First, why do we even need Docker? Imagine a new developer joins your team and you explain all the setup, dependencies, and versions. But they install the latest versions while your app depends on older ones. there will be dependency mismatch. Even if versions match, OS differences (Mac vs Windows) can still break things.
Instead of this messy setup, we use Docker. It lets you containerize your app so it runs the same way on any machine Without any issues.
There are few concepts in Docker that every developer should know.
Image: This is just a blueprint of your app That contains code, dependencies, setup.
Container: Container is the running instance of the image. This is where your actual app running.
Dockerfile: A file where you define how your image should be built. In this, we configure what Docker image we are going to use, what dependency and how our app will run.
Dockerhub: It is like GitHub but for Docker images, where we build our image and publish on it.
These are the few concepts that everybody must know about Docker, and now we are going to write the first Dockerfile.
- We will define our base image, like what image we are going to use, what is the base image in our product.
- We define the working directory where our app should be initialized in the image.
- We copy the package.json file first because of caching.
- We install all the dependencies.
- We copy all folder and files, etc.
- We expose the command to run our project, like
npm start. As shown in the picture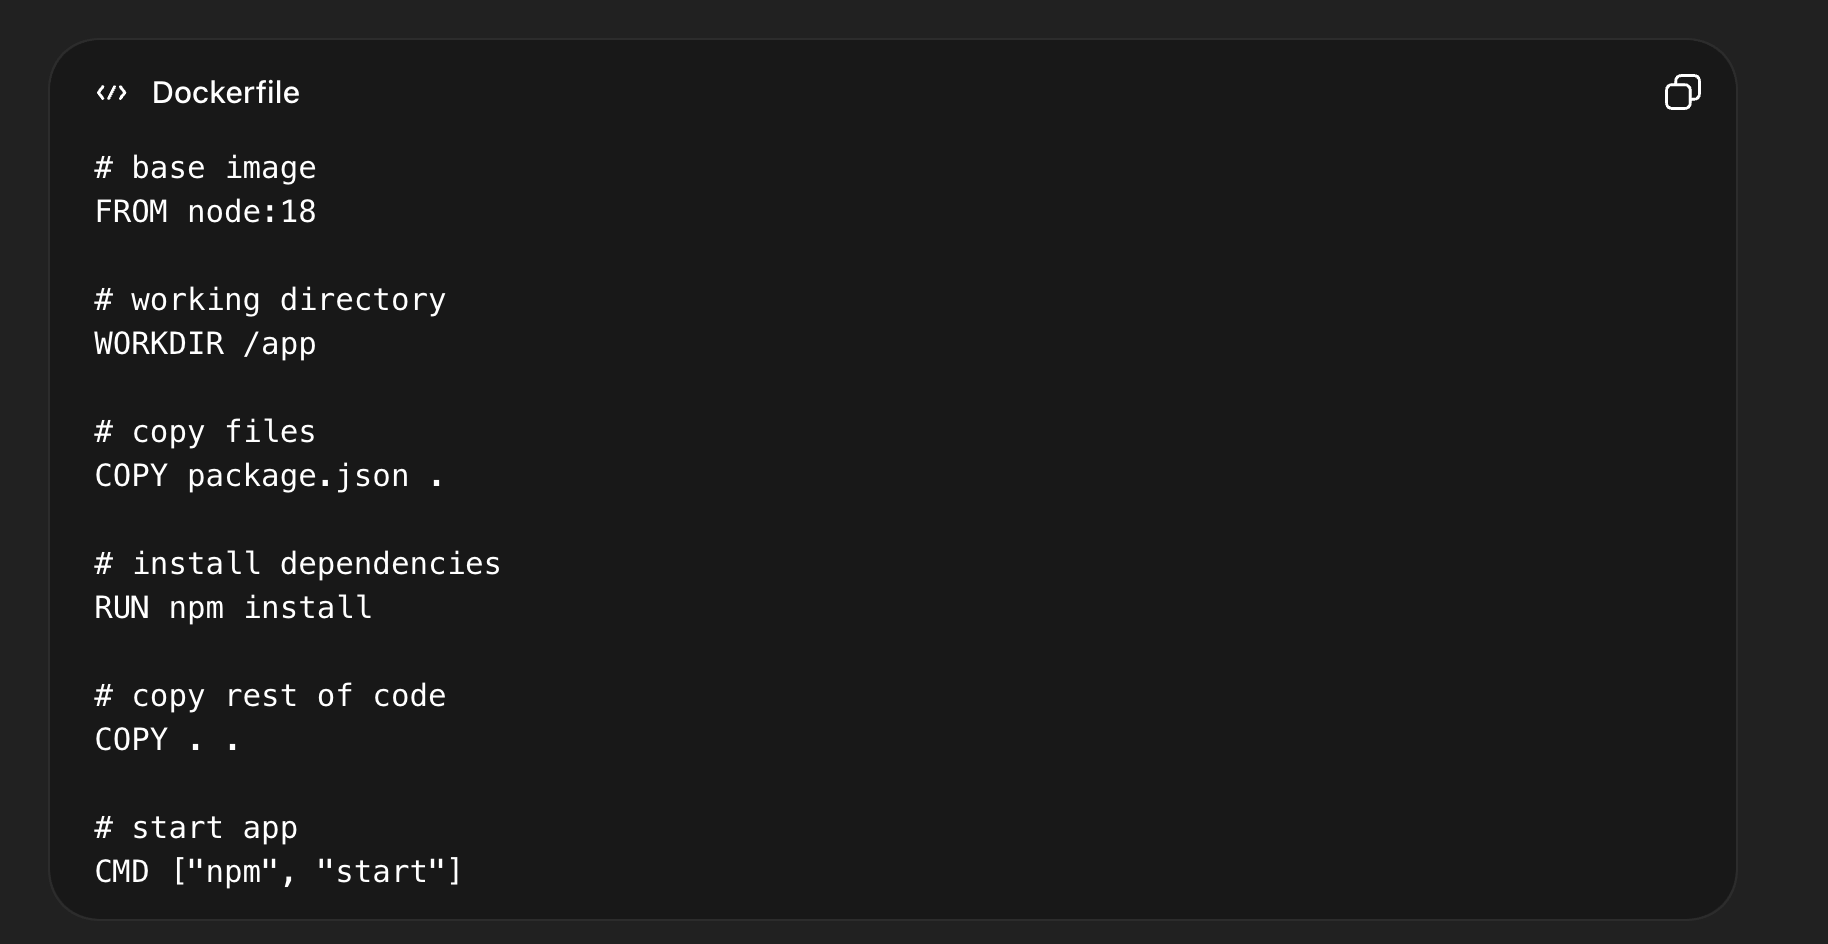
After creating an image for our app, we can build it and push it to Docker Hub so that other developers can pull it and run our app directly.
- build cmd:- docker build -t my-app .
- running image:- docker run -p 3000:3000 my-app
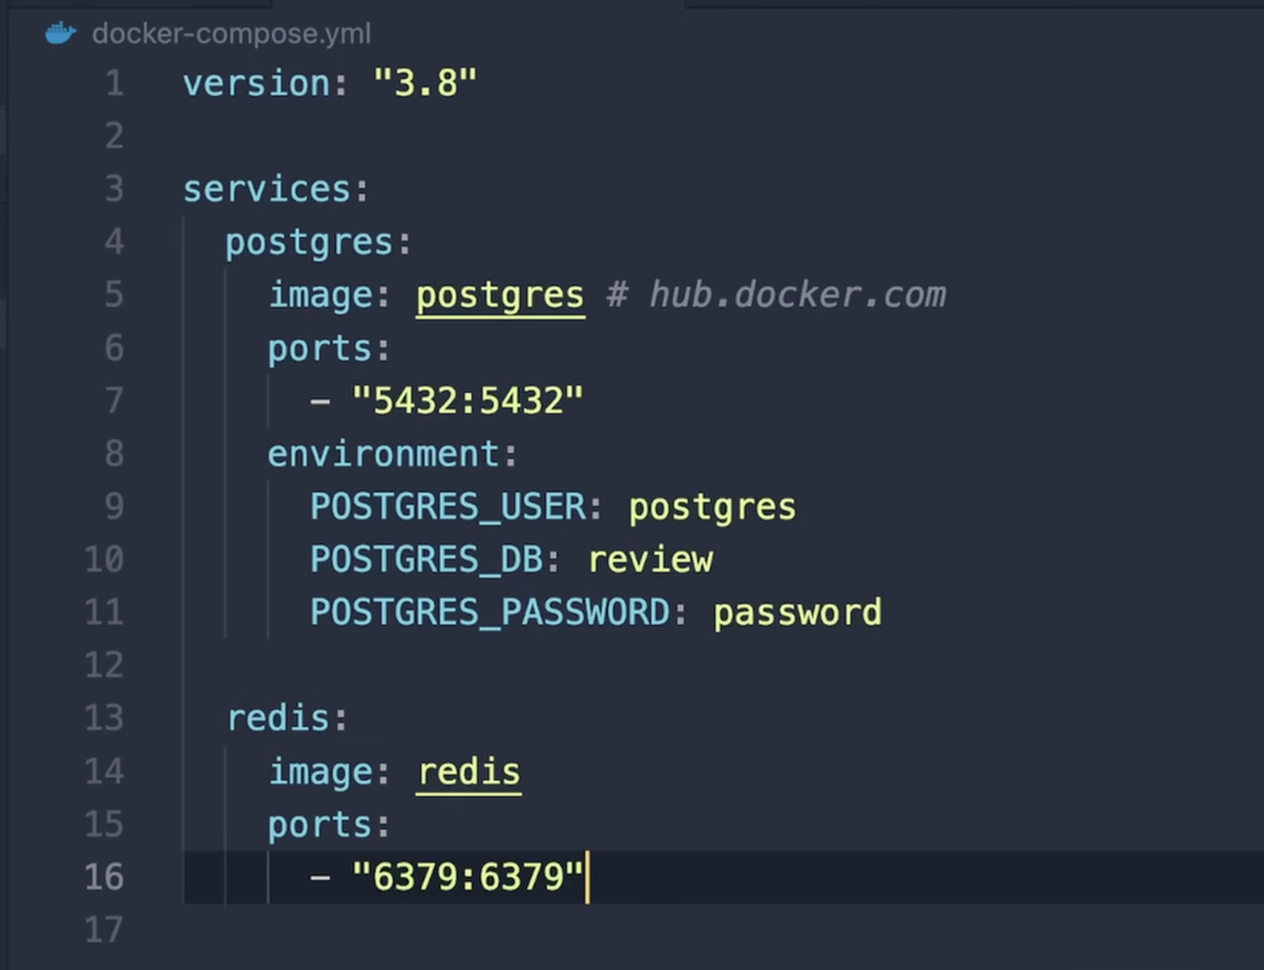
Docker Compose (for multiple services): When we have multiple containers like postgres, node, bun, etc., then instead of starting each container manually, we create docker-compose. Docker-compose lets us run all the containers with a single command. This is the example of a docker compose file. Here we are running multiple services like Postgres, Redis, etc.
We can run all the services with a single command that is : docker-compose up
Docker Networking: Before going into Docker networking, one thing to understand is that till now we were running a single container. But in real-world apps, we have multiple containers like backend, database, Redis, etc.
Now the question is how do they talk to each other? By default, every container is isolated. So they can’t communicate directly. This is where Docker networking comes in.
Docker networking allows containers to talk to each other using a network.
In Docker, each container gets its own IP, but we don’t use IPs because they change. Instead, we use container names.
Example:
First, create a network: docker network create app-network
Run database: docker run -d --name db --network app-network postgres
Run backend: docker run -d --name backend --network app-network my-app
Now backend can talk to db using: DB_HOST=db
Docker Volumes: Now let’s talk about Docker volumes. By default, containers are temporary. If your container stops or gets deleted, all the data inside it is gone. This is a problem, especially for things like databases.
To solve this, we use volumes. Volumes are used to persist data outside the container. So even if the container is deleted, your data is safe.
Example: docker run -v my-data:/data my-app
Here, my-data is volume. and /data is path inside container. Now whatever is stored in /data will not be lost.
There are mainly two types:
Named Volumes Docker manages them. docker run -v my-data:/data my-app
Bind Mounts You link your local folder to container. docker run -v $(pwd):/app my-app. It is used in development for live reload And syncing code.